Well, it’s been four years since I last posted about container orchestration in the enterprise and took a deep dive on executing ML tasks on each cloud’s Kubernetes.
With that history in mind, when an older tower became available, I slapped Ubuntu Server 20.04 on it and started playing around with Microk8s, a simple k8s deployment meant for a single machine. The tower is a 7-year old HP workstation, but with 48 GB of RAM, and an adequate 2 TB of spinning rust storage, though sadly without SSD.
But Kubernetes is an enterprise platform, built for enterpise problems right? Of course, but deploying a single-instance cluster (yes, that’s an oxymoron) onto a laptop or workstation provides a great entry for learning more about k8s.
Ubuntu + Microk8s
With Ubuntu Server being my preferred home lab OS, using their snap for Microk8s seemed an obvious choice.
Following the Getting Started guide:
sudo snap install microk8s --classic --channel=1.18/stable
sudo usermod -a -G microk8s $USER
sudo chown -f -R $USER ~/.kube
tee -a ~/.bash_aliases <<<EOF
alias kubectl='microk8s kubectl'
EOF
su - $USER
microk8s status --wait-ready
kubectl cluster-info
kubectl get services
k8s-dashboard
Up next was deploying the web-based dashboard for some more insight into the new k8s “cluster”. So, again following the Microk8s docs:
microk8s enable dns storage dashboard
kubectl label service/kubernetes-dashboard kubernetes.io/cluster-service=true --namespace kube-system
kubectl cluster-info
This provided cluster output showing that the Dashboard was available on the microk8s host, locally on port 16443:
davis@boromir:~$ kubectl cluster-info
Kubernetes master is running at https://127.0.0.1:16443
Heapster is running at https://127.0.0.1:16443/api/v1/namespaces/kube-system/services/heapster/proxy
CoreDNS is running at https://127.0.0.1:16443/api/v1/namespaces/kube-system/services/kube-dns:dns/proxy
kubernetes-dashboard is running at https://127.0.0.1:16443/api/v1/namespaces/kube-system/services/https:kubernetes-dashboard:/proxy
Grafana is running at https://127.0.0.1:16443/api/v1/namespaces/kube-system/services/monitoring-grafana/proxy
InfluxDB is running at https://127.0.0.1:16443/api/v1/namespaces/kube-system/services/monitoring-influxdb:http/proxy
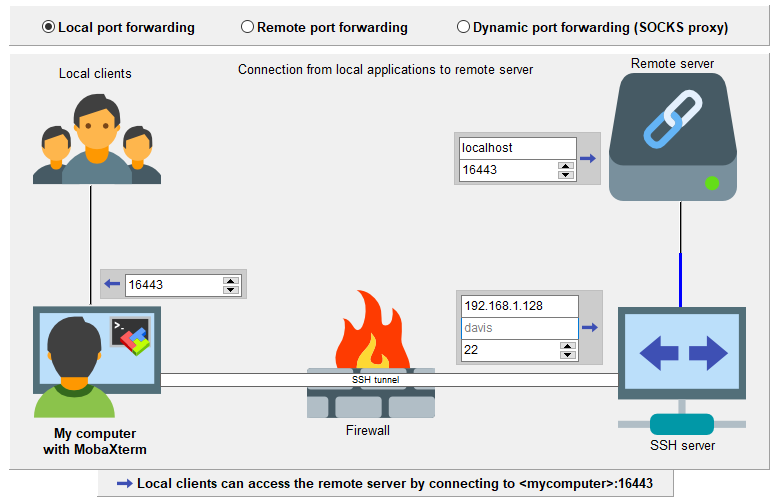
As I was already SSH’d into the host from my Windows desktop, using MobaXterm, I set up an SSH tunnel as shown:
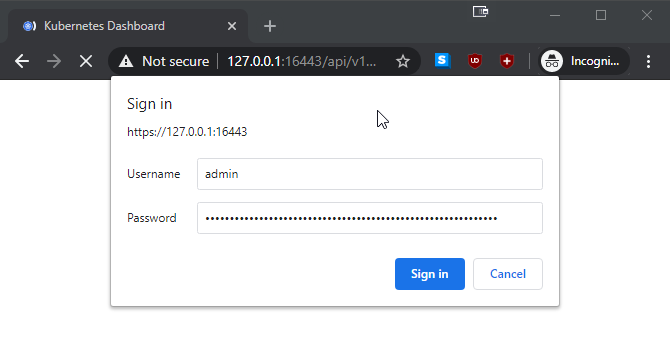
However on browsing to https://127.0.0.1:16443/api/v1/namespaces/kube-system/services/https:kubernetes-dashboard:/proxy/#/ on my local Windows system, and reaching the dashboard via the SSH tunnel, I received a basic auth prompt in browser.
Searching I found this StackExchange answer which led me to create this script:
#!/bin/bash
#
# Performs the silliness required to authenticate into the k8s-dashboard, bound locally via tunnel
#
basic_auth_passwd=$(sed -n 's/,admin,admin.*//p' /var/snap/microk8s/current/credentials/basic_auth.csv)
echo "Basic authentication: admin / $basic_auth_passwd"
token=$(microk8s kubectl -n kube-system get secret | grep default-token | cut -d " " -f1)
microk8s kubectl -n kube-system describe secret $token | grep "^token" | xargs | cut -d " " -f 2
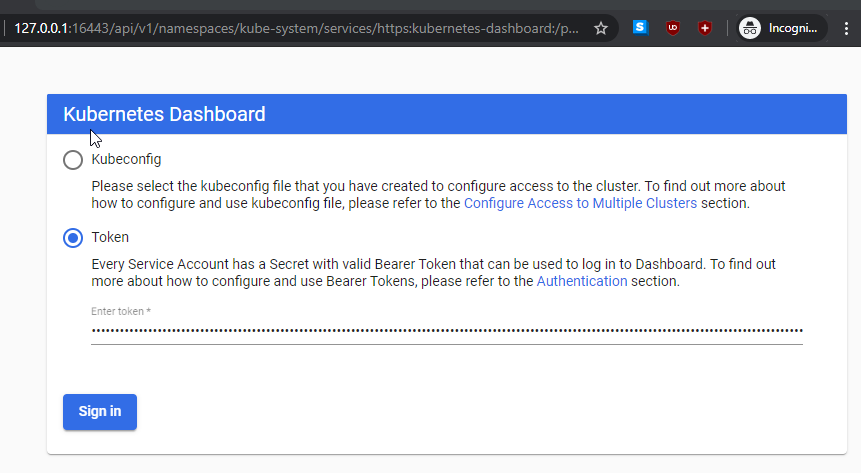
On inputting the token:
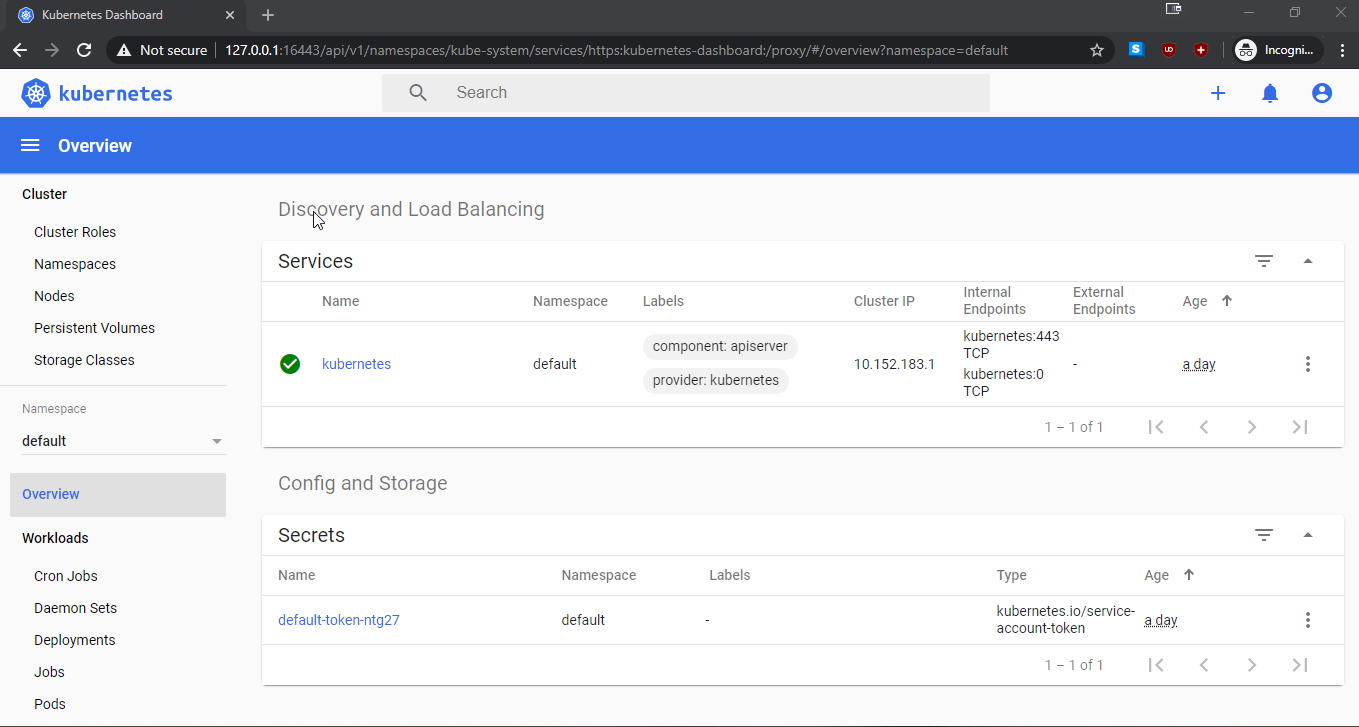
Then was able to view the dashboard:
Honestly, that’s not the best experience for a home labber who is used to immediate gratification on a new software install.
A Better Way!
After scratching my head about the benefit of a double-login for simple homelab install of microk8s dashboard, I stumbled across this great article which showed how to almost avoid of it.
For a k8s install on a home network, used solely for experimenting, its reasonable to disable the requirement for token authentication to the dashboard by adding - --enable-skip-login to the deployment spec’s container args section.
As well, it’s possible to setup a proxy for remote access to localhost bound endpoints:
sudo microk8s.kubectl proxy --accept-hosts=.* --address=0.0.0.0 &
With these two steps done, it’s now possible to just click ‘Skip/Cancel’ past the Token login after browsing directly from my workstation to the dashboard link at:
http://{IP_address}:8001/api/v1/namespaces/kube-system/services/https:kubernetes-dashboard:/proxy/
Using the proxy this way, also avoids the SSL certificate error due to self-signed certificate. Obviously this is not reasonable for production, but a token-less, proxied dashboard is simple to use for the homelabber looking to experiment with microk8s.
More in this series…
- microk8s upgraded - Upgrading to k8s 1.19
- kubeflow setup - Enabling ML workflows
- MNIST notebook - Using Jupyter notebooks on Kubeflow
- kubeflow pipelines - Deploying pipelines on Kubeflow