After migrating to Windows on my old laptop and installing WSL, I also wanted to get up to speed on Anaconda. I’d previously used Anaconda as a simple Python install on Windows, but haven’t had time to really get into the data science libraries it offers.
Anaconda Install
Downloading and running the 64-bit Windows installer for Python 3.7 was straight-forward. This gets one a good number of default packages, with more available via the conda package manager.
Using Navigator
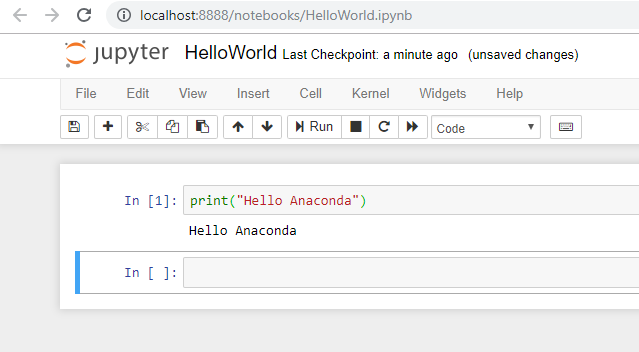
Available, from the Start menu, Anaconda Navigator launches a command window, and then opens a browser window to an interactive Python session. Adding a simple print statement, saving it, and running yields:
Installing Packages
So, I thought to give this CPU vs GPU test a try. First off, this was unlikely to work on my crappy old laptop with only Intel integrated graphics:
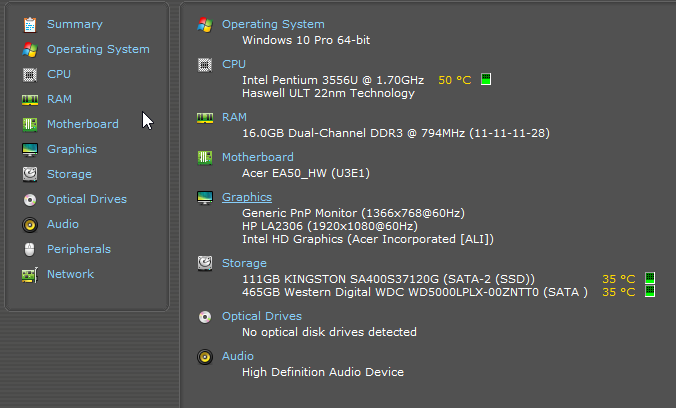
I mean, CUDA specifically is built for Nvidia GPUs. Even my recently built budget gaming PC with a decent AMD APU won’t work with CUDA.
So instead, I installed the CPU-only version of Pytorch, in an Anaconda command prompt (run as Administrator):
conda install pytorch-cpu torchvision-cpu -c pytorch
Pytorch CPU/GPU Test
So with Pytorch installed, I returned to my Jupiter Notebook launched in Anaconda Navigator:
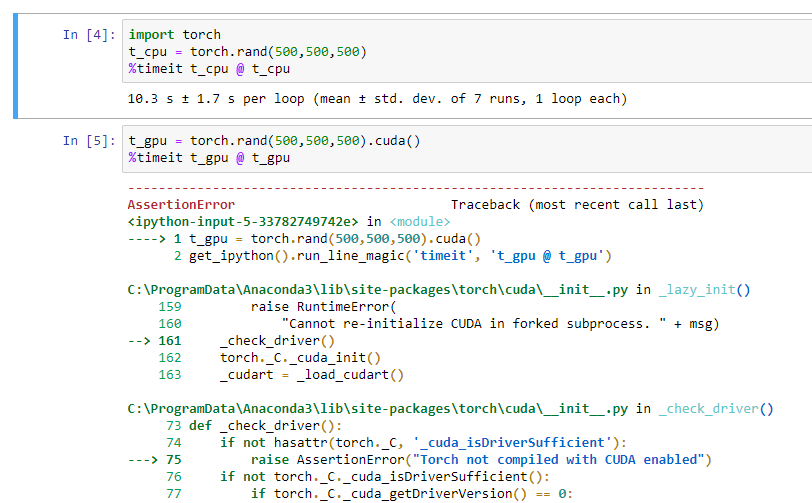
As you can see, my old laptop very slowly executed the CPU test, but errored on the GPU test.
Conclusions
So it seems using a 5-year budget laptop ($300 CDN when new), may not be the path to performant data science and machine learning workflows. :)
I could add a top of the line Nvidia RTX 2080ti to our gaming PC for nearly $2k CDN but that seems a waste of money. To simply dabble, one need only launch a cloud instance and pay by use, a few hours at a time. Up next…