Introduction
In my earlier post about vibe coding a Dart app, I used Google Antigravity to build a Flutter project. Since then, Google’s agent tools have grown beyond the IDE, and a different kind of coding harness has caught my attention: Pi, running against a model served locally by Ollama.
These tools occupy related but distinct places in a developer’s workflow. Antigravity offers a managed agent platform across a standalone desktop app, a terminal interface, and an IDE. Pi is a small, customizable coding agent that can connect to several model providers, including a local Ollama server. This post looks at what each surface is for, then walks through a practical Windows setup for Pi on an NVIDIA GeForce RTX 3070 Ti.
Google’s Antigravity Surfaces
The naming can be confusing because “Antigravity” now refers to a family of products, not just the editor I used previously. Google’s current product describes four related surfaces: Antigravity 2.0, Antigravity CLI, Antigravity SDK, and Antigravity IDE.
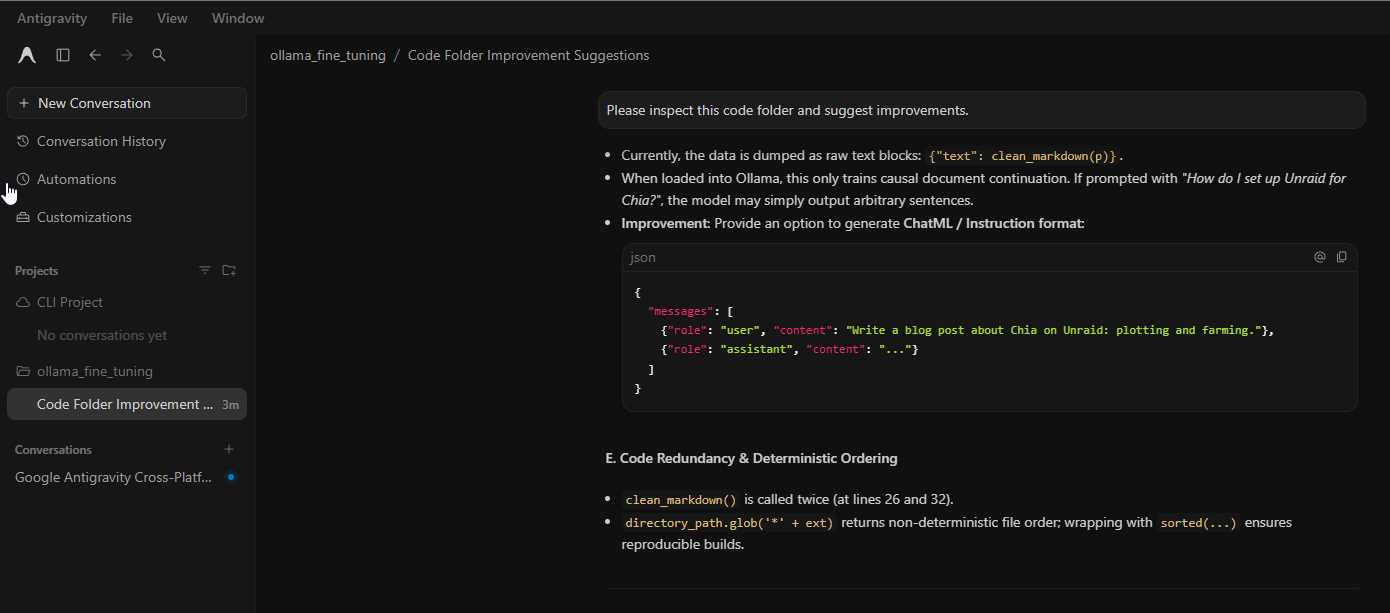
Antigravity 2.0: the desktop agent app
Antigravity 2.0 is a standalone application and agent command center. It can work independently of an IDE, managing projects and conversations while agents operate on local folders and repositories. A project can include multiple folders, and agents can work directly in the selected folder or in an isolated Git worktree.
The app is strongest when I want to direct and supervise work across several agents or projects. It supports background tasks, subagents, plans and other reviewable artifacts, browser interaction, shell commands, file editing, skills and MCP integrations. Per-project settings and permissions help distinguish a trusted codebase from an unfamiliar one. Scheduled automations and Remote Control extend that workflow: I can schedule a task or monitor a running desktop session from a browser.
The key idea is orchestration. Instead of making the editor the center of every interaction, the desktop app gives conversations, agents, and their outputs a workspace of their own. I can move to an IDE when I want to work more closely with the code.
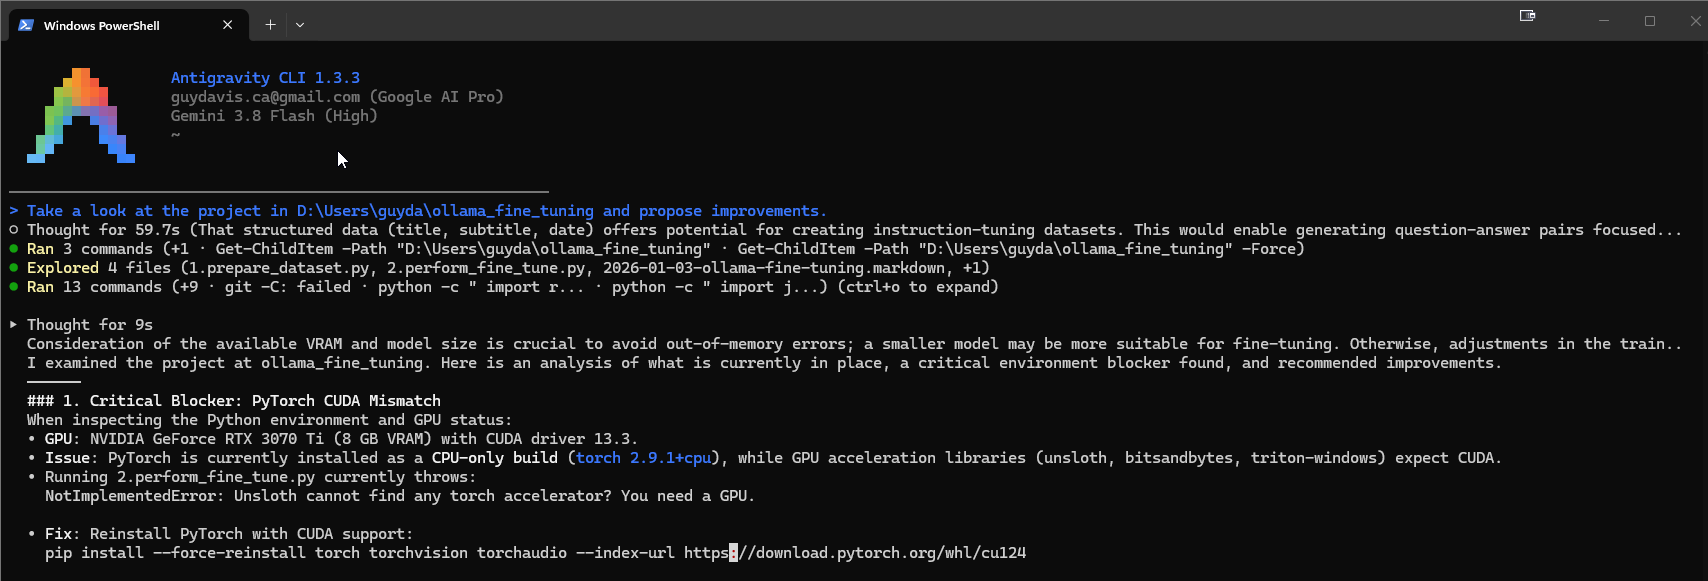
Antigravity CLI: the same agent harness in a terminal
The CLI installs as agy and presents a keyboard-driven terminal UI. Google’s documentation describes it as using the same core agent harness as Antigravity 2.0, so multi-step reasoning, multi-file edits, tool use, and conversation history are available without running a full desktop IDE. Its lightweight footprint suits terminal-first work, SSH, and terminal multiplexers such as tmux.
The CLI can read and edit project files, run shell commands, use browser and MCP tools, and delegate background work to subagents. Its /agents panel lets me inspect those subagents and handle approval requests. Other useful commands include /diff to review changes, /resume to reopen a conversation, /permissions to adjust autonomy, /plugin to manage plugins, and /remote-control to monitor a session from a browser. The same account and settings connect the CLI and desktop app, and a conversation can move from the terminal to the desktop app when the work benefits from visual orchestration.
On Windows, install the CLI from PowerShell and start it in the repository you want it to work on:
irm https://antigravity.google/cli/install.ps1 | iex
agy --version
cd C:\path\to\project
agy
On first run, sign in with a Google account in the browser. The installer adds agy to the current user’s local app-data path; if the command is not found immediately, open a new terminal so it reloads PATH. On macOS and Linux, Google’s install script is:
curl -fsSL https://antigravity.google/cli/install.sh | bash
agy --version
The agent asks for approval before potentially risky actions by default. Keep those controls enabled until you understand the permissions for the current workspace. The CLI’s terminal sandbox is an additional containment option; review what it allows before using the agent on sensitive projects.
Antigravity IDE: the code-centered workspace
Antigravity IDE remains the most integrated surface for hands-on software development. Its editor, agent chat, autocomplete, browser agent, and reviewable artifacts are arranged around a code workspace. Agents can work asynchronously across workspaces, while the browser agent can help test or inspect a running UI. Plans, diffs, diagrams, and browser recordings make the agent’s intermediate work easier to inspect.
The difference is not that one surface has agents and the others do not. They share core agent capabilities. The difference is the working context:
| Surface | Best fit | What stands out |
|---|---|---|
| Antigravity 2.0 app | Coordinating work across projects and agents | Standalone command center, project management, parallel/background work, scheduled tasks, Remote Control |
| Antigravity CLI | Terminal-first coding, SSH, and quick task loops | Lightweight TUI, shell-native workflow, plugins, subagent controls, shared conversations |
| Antigravity IDE | Editing and verifying code in an integrated workspace | Full editor, inline completion, browser tools, artifacts, and visual review |
| Antigravity SDK | Building custom agent applications or evaluations | Python access to Antigravity’s harness |
I think of the app as the place to orchestrate, the IDE as the place to work visually with code, and the CLI as the place to keep the agent close to the shell. The choice depends more on how I want to supervise a task than on a different underlying agent.
Pi: a Smaller, More Configurable Coding Harness
Pi is an extensible coding agent that runs in a terminal. Out of the box it can read files, edit files, write files, and run shell commands. It keeps its core deliberately small: rather than bundling every workflow into the agent, Pi can be extended with skills, prompt templates, themes, and packages. It also supports interactive sessions, one-shot print mode, structured JSON output, RPC control, and a TypeScript SDK.
That minimalism is appealing when I want to choose the model provider myself, including a model that never leaves my own machine. Pi is not a graphical IDE, and its default feature set is intentionally narrower than Antigravity’s agent platform. In particular, Pi does not include a built-in subagent system or plan mode; those can be added through extensions or implemented for a particular workflow. Its value is the adaptable harness, not a promise that a small local model will match a frontier model’s coding ability.
Run Pi Through Ollama on an RTX 3070 Ti
Ollama serves local models on localhost, and its Pi integration sets up Pi as a client of that local service. A desktop RTX 3070 Ti normally has 8 GB of VRAM. That is enough to make a quantized 7B model a practical starting point, but model weights are only part of memory use: the context cache, Windows desktop, editor, and other GPU workloads need room too. Larger models may spill onto system RAM or run out of memory, and a large context window can consume more VRAM than expected.
For this walkthrough I use qwen3:4b, listed by Ollama at about 4 GB with a 32K context. Treat that size as the download/model footprint, not a guarantee that the full context will fit in 8 GB of VRAM. Start with a modest coding task and a shorter context if memory is tight. The model must also reliably produce tool calls for the agent to use Pi’s file and shell tools; test it on a harmless task before trusting it with a real change.
1. Install Ollama and check the GPU
Install the current Ollama for Windows and update the NVIDIA driver. Ollama supports the RTX 3070 Ti. In PowerShell, confirm that Windows sees the card:
nvidia-smi
ollama --version
Ollama runs as a Windows application in the background. Keep it running while you use Pi. The local API normally listens on http://localhost:11434.
2. Pull and test a local coding model
Download the 7B Qwen Coder model, then send it a small prompt before involving an agent:
ollama pull qwen3:4b
ollama run qwen3:4b
Ask it to explain a short code snippet, then exit the chat with /bye. The model identifier matters: use the exact local tag in the Pi launch command, and avoid a :cloud model tag when the goal is local inference.
3. Launch Pi from Ollama
From the repository directory, run:
cd C:\path\to\your\project
ollama launch pi --model qwen3:4b
Ollama’s launcher installs Pi if needed, configures Ollama as Pi’s provider, and starts an interactive session. Passing --model explicitly selects the local model instead of taking a default. On the first run, allow time for setup and check that the model name shown in Pi is qwen3:4b.
If you want to configure the integration without opening a session, use:
ollama launch pi --config
Pi also supports manual Ollama configuration. This is useful if the auto-setup does not recognize a model or you want to inspect the provider settings. The relevant files are under %USERPROFILE%\.pi\agent\ on Windows. Add the provider to models.json:
{
	"$schema": "https://pi.dev/schemas/models.schema.json",
	"providers": {
		"ollama": {
			"baseUrl": "http://localhost:11434/v1",
			"api": "openai-completions",
			"apiKey": "ollama",
			"models": [
				{ "id": "qwen3:4b" }
			]
		}
	}
}
The apiKey value is a placeholder required by the OpenAI-compatible client; Ollama ignores it for the local server. To make the provider/model the startup default, set settings.json to:
{
	"defaultProvider": "ollama",
	"defaultModel": "qwen3:4b"
}
Restart Pi after editing these files, then use /model to confirm the model is available. If Pi reports that the model is missing or unavailable, check that Ollama is running, the model tag matches ollama list, and the base URL is still http://localhost:11434/v1.
4. Confirm inference is using the GPU
While a prompt is running, open a second PowerShell window and check Ollama’s process list:
ollama ps
Look at the PROCESSOR column. 100% GPU means the model is entirely on the GPU; a CPU/GPU split means some of it is using system memory. You can also watch nvidia-smi for VRAM use. If the model is partly on the CPU, reduce other GPU workloads and try a smaller context or a smaller model before assuming GPU support is broken. Use the Windows Ollama application to update or restart the server after changing its configuration.

5. Try a small, reviewable coding task
Start with a bounded request, such as asking Pi to explain one file, add a focused test, or make a small change and run the relevant test command. Pi’s standard tools can read and write files and run shell commands, so review the diff and test output yourself. On Windows, Pi uses Git Bash for its Bash tool when available; its optional PowerShell tool can be enabled if the project depends on PowerShell-specific commands.
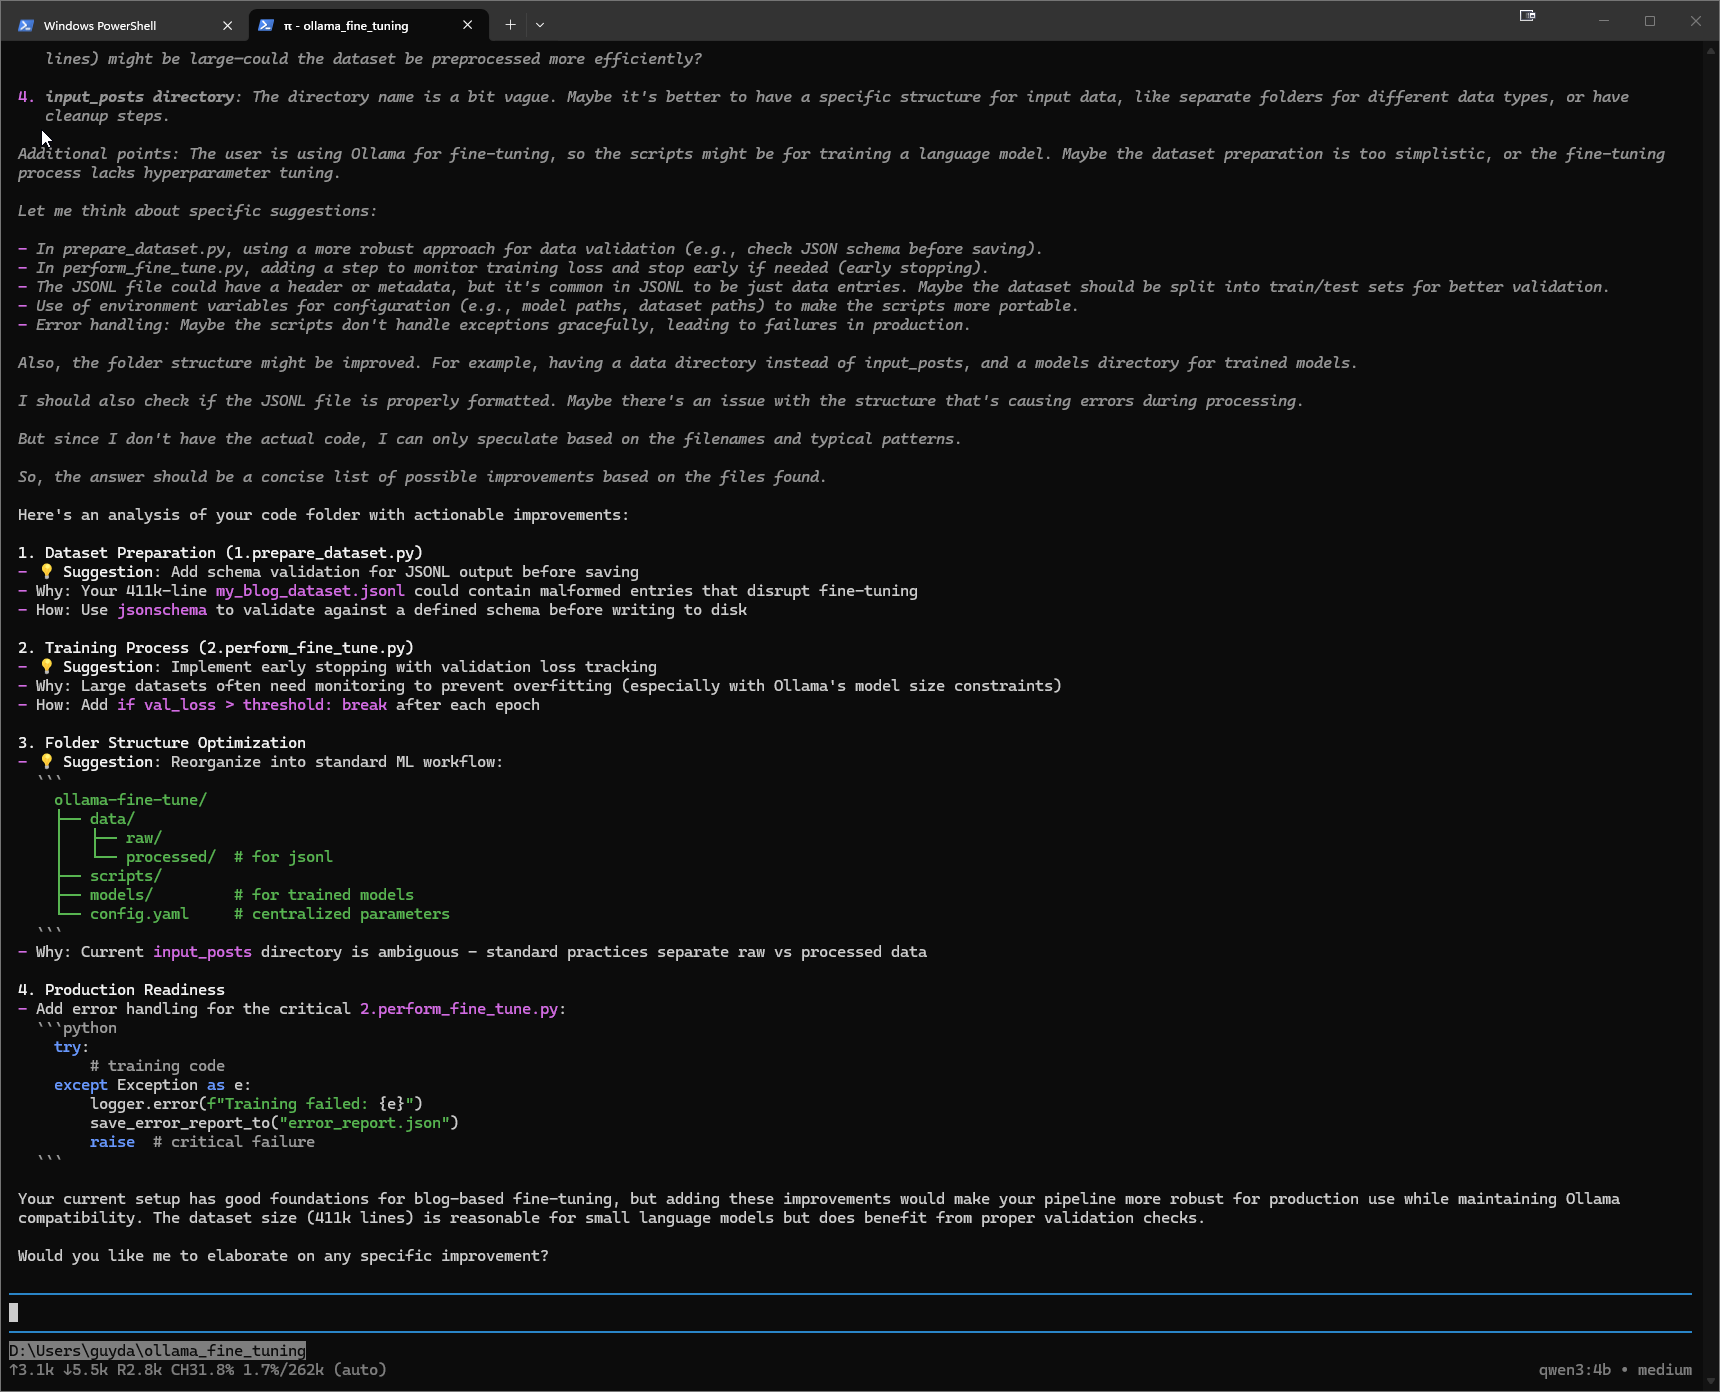
Local inference gives me more control over where prompts and source code are processed, and avoids per-token API charges for that model. It does not make the agent infallible or automatically make the entire workflow offline: model downloads require a network connection, and optional extensions such as web search make network requests. Also, Pi’s tools execute with the permissions of the user who started Pi. Pi does not provide a built-in filesystem or process sandbox, so use a clean Git branch or worktree, avoid secrets in the working tree, and inspect proposed edits and shell commands.
Conclusion
Antigravity’s app, CLI, and IDE each offer a different way to direct a shared agent platform. The desktop app is built for orchestration, the CLI for a terminal-centered workflow, and the IDE for close interaction with code and visual artifacts. Pi takes the opposite design angle: a compact, customizable harness that can sit on top of a local Ollama model.
A 3070 Ti can make local coding assistance genuinely useful, especially for contained edits and explanations, but 8 GB of VRAM sets real limits on model size and context. Starting with a 7B quantized coding model, checking ollama ps, and keeping tasks reviewable makes the experiment practical without pretending it is equivalent to a larger hosted model.
References
- Google Antigravity product overview
- Antigravity 2.0 overview and features
- Antigravity CLI overview
- Antigravity CLI installation and authentication
- Antigravity IDE overview
- Ollama: Pi integration
- Ollama: NVIDIA hardware support
- Ollama: Qwen2.5 Coder model page
- Pi: choosing and configuring a model
- Pi: Windows setup
More in this series…
- Vibe Coding Dart with Google Antigravity - Building a Flutter web app with an AI coding agent.