As part of my research into open-source autonomous drone platforms and Canadian RPAS regulations, I set out to build a local development and simulation environment on Linux before committing to physical hardware.
The goal was to run ArduPilot SITL (Software In The Loop) linked to Gazebo Harmonic to test flight dynamics, autonomous waypoint missions, and Python automation via pymavlink—all running on standard developer hardware.
Here is a breakdown of the setup architecture, the configuration steps, and a few driver and build gotchas encountered along the way.
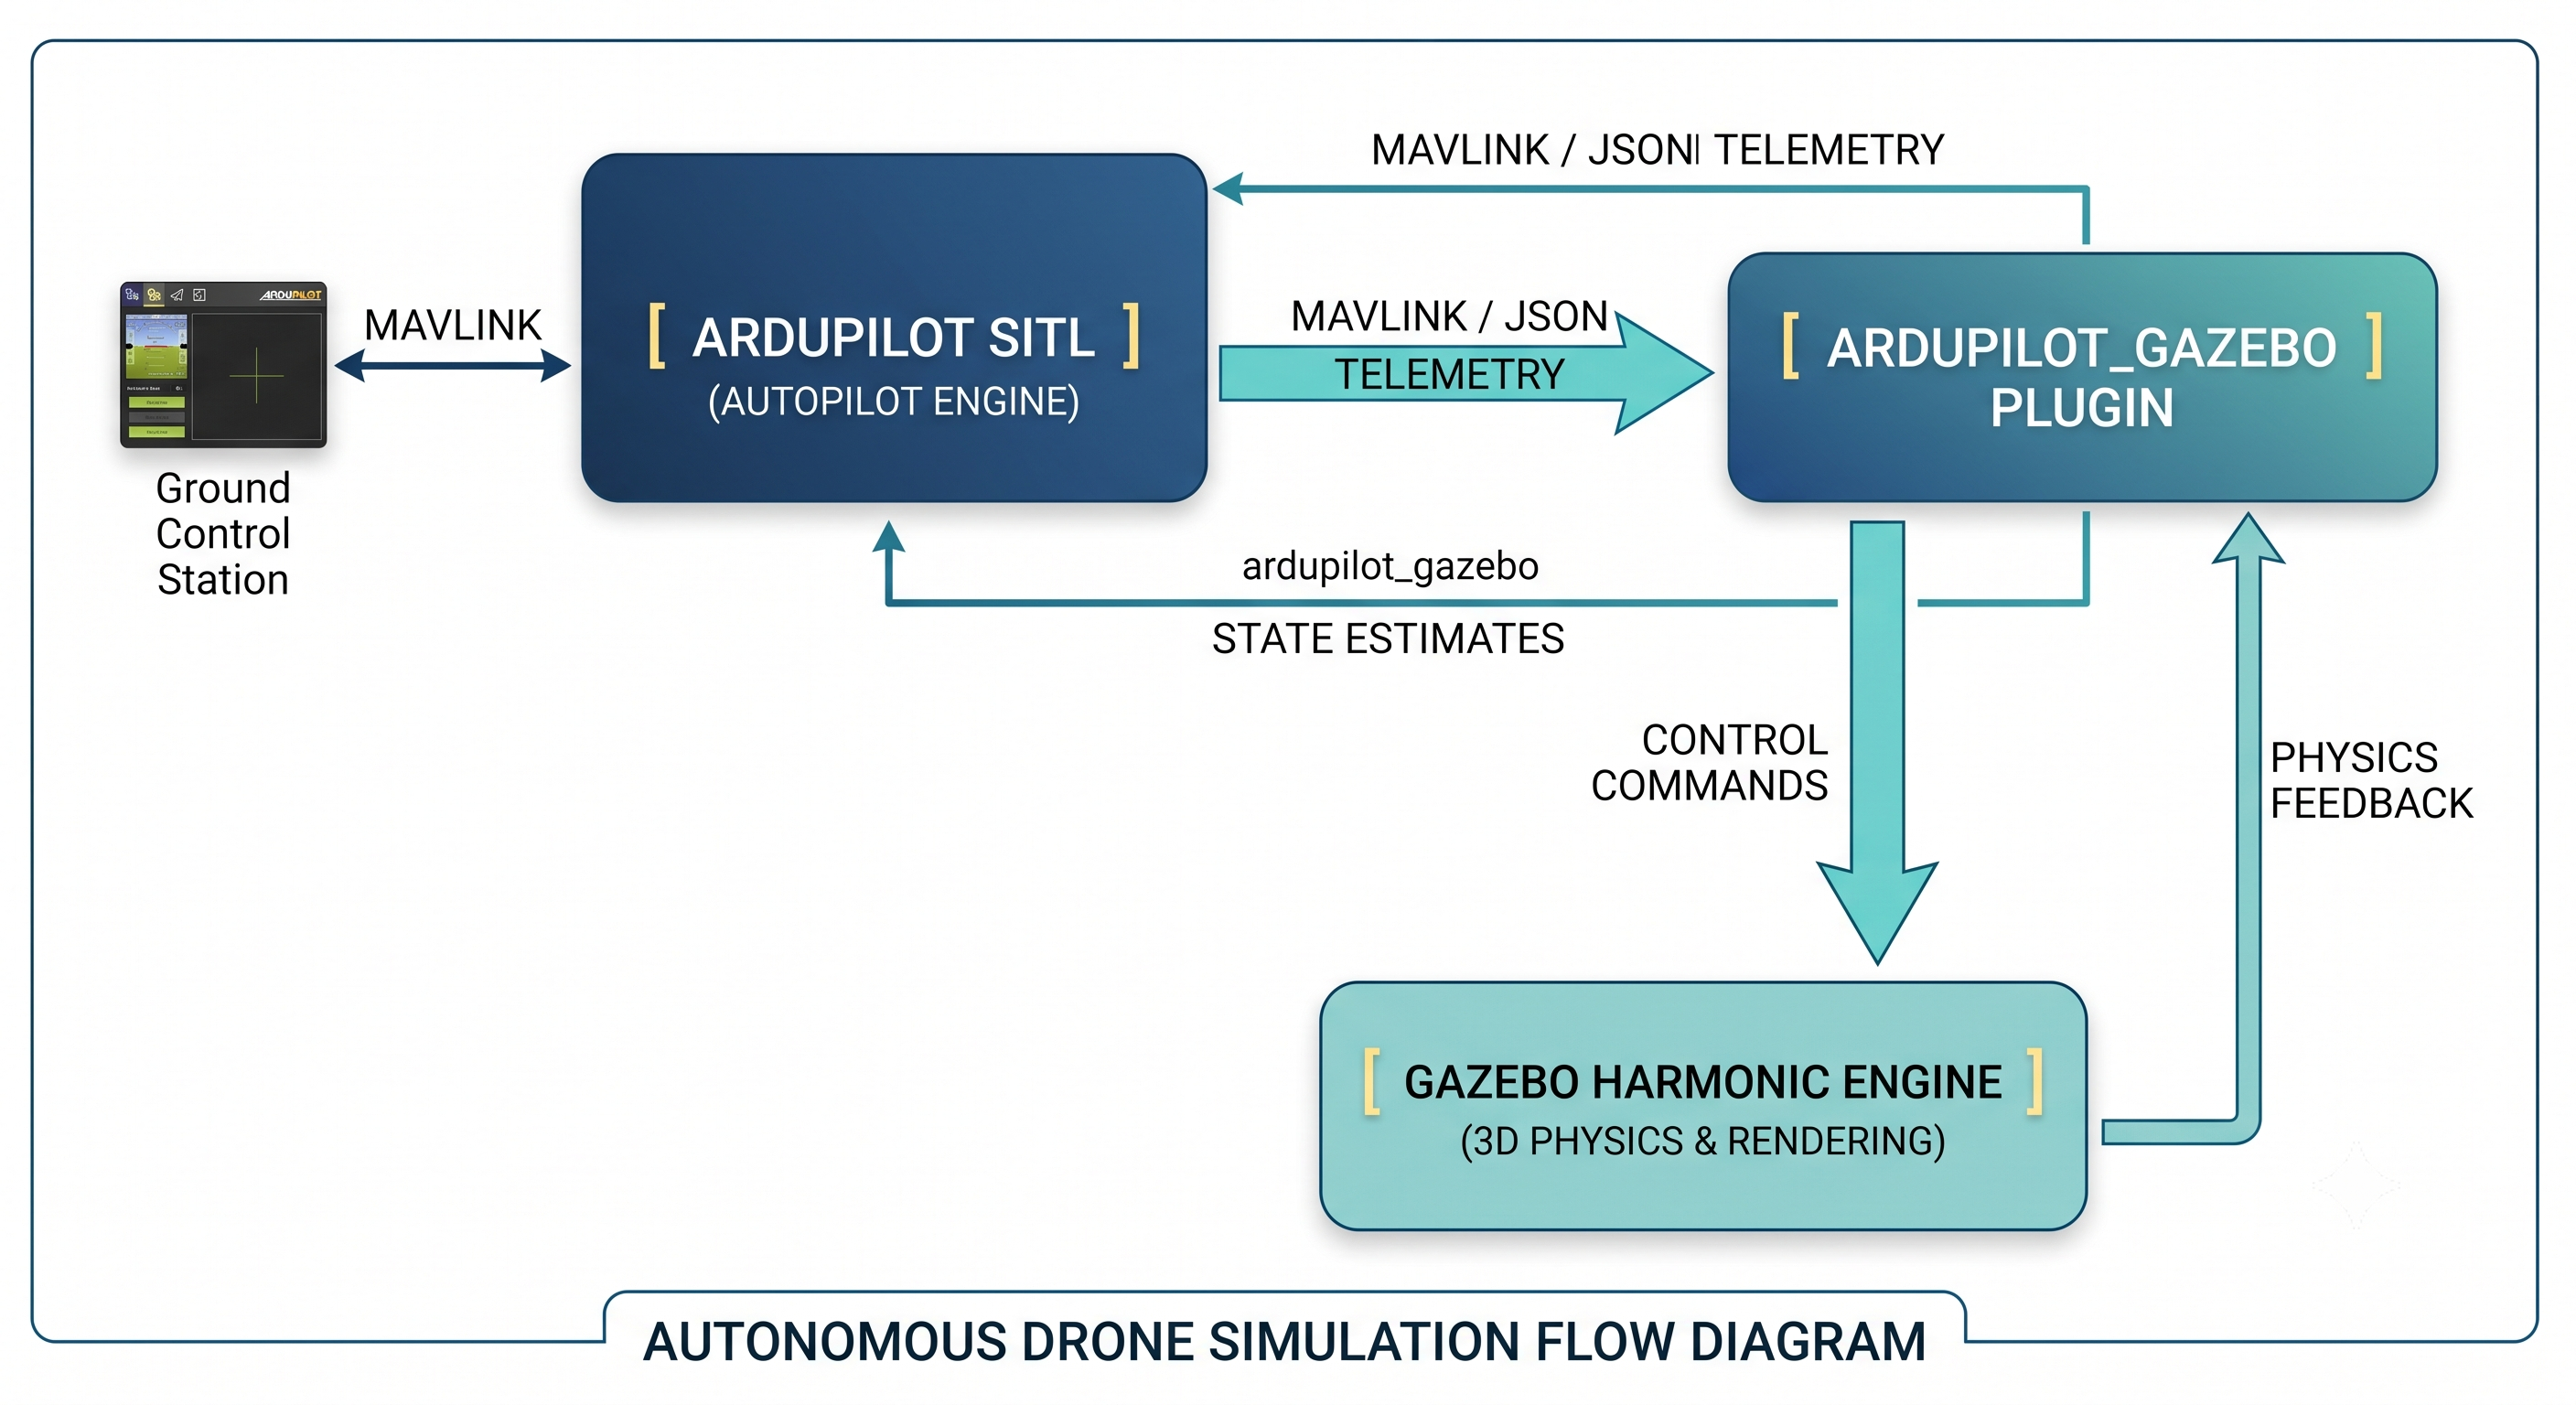
Simulation Architecture
The simulation environment breaks down into two core engines connected via local network loops:
- ArduPilot SITL: Compiles and executes native C++ autopilot logic. It manages flight control loops, sensor parsing, state estimation, and navigation.
- Gazebo Harmonic: Renders the 3D physics environment, gravity, wind, and ground collision models.
- ardupilot_gazebo Bridge: An open-source plugin that handles two-way JSON/MAVLink telemetry between SITL and Gazebo.
Setup & Dependencies
Because this setup was configured on a local mount (/mnt/aragorn/), environment variables needed to explicitly register custom path locations for binaries, models, and world files.
1. Registering the Gazebo OSRF Repository
Standard Ubuntu repositories do not include the latest Gazebo Harmonic releases. First, add the official Open Source Robotics Foundation keyring:
sudo apt update && sudo apt install -y curl lsb-release gnupg

sudo curl [https://packages.osrfoundation.org/gazebo.gpg](https://packages.osrfoundation.org/gazebo.gpg) --output /usr/share/keyrings/pkgs-osrf-archive-keyring.gpg

echo "deb [arch=$(dpkg --print-architecture) signed-by=/usr/share/keyrings/pkgs-osrf-archive-keyring.gpg] [https://packages.osrfoundation.org/gazebo/ubuntu-stable](https://packages.osrfoundation.org/gazebo/ubuntu-stable) $(lsb_release -cs) main" | sudo tee /etc/apt/sources.list.d/gazebo-stable.list > /dev/null

sudo apt update
sudo apt install -y gz-harmonic libgz-sim8-dev rapidjson-dev libopencv-dev
2. Building the Gazebo-ArduPilot Bridge
To handle onboard camera feeds (e.g., GStreamer video telemetry from a gimbal), install the GStreamer development headers before running cmake:
sudo apt install -y libgstreamer1.0-dev libgstreamer-plugins-base1.0-dev gstreamer1.0-plugins-bad gstreamer1.0-libav gstreamer1.0-gl

cd /mnt/aragorn/misc/software/gz_ws/src/ardupilot_gazebo
mkdir -p build && cd build
export GZ_VERSION=harmonic
cmake .. -DCMAKE_BUILD_TYPE=RelWithDebInfo
make -j$(nproc)
Common Gotchas & Troubleshooting
Gotcha #1: Mesa / OGRE2 Driver Segfaults
When launching Gazebo with a camera-equipped model (iris_runway.sdf), OGRE2’s multi-threaded offscreen render thread can trigger a segmentation fault inside Mesa’s Gallium driver (libgallium.so):
[Wrn] [Ogre2Camera.cc:423] Ogre2Camera::SetVisibilityMask...
Segmentation fault (Address not mapped to object [0xf0]) in libgallium
Fix: Force Gazebo to use the more stable OGRE 1.x rendering engine flag at startup:
gz sim -v4 -r /mnt/aragorn/misc/software/gz_ws/src/ardupilot_gazebo/worlds/iris_runway.sdf --render-engine ogre
Gotcha #2: PEP 668 and Python Build Dependencies
ArduPilot’s Waf build system relies on empy==3.3.4 for C++ template parsing. On modern Ubuntu releases, pip install throws an externally-managed-environment error.
Fix: Pass the –user and –break-system-packages flags, or use a Python virtual environment:
python3 -m pip install empy==3.3.4 pexpect pymavlink mavproxy --user --break-system-packages
Environment Configuration
To ensure tools like sim_vehicle.py and Gazebo resource paths persist across terminal sessions, append your local workspace paths to ~/.bashrc:
# ArduPilot SITL execution tools
export PATH=/mnt/aragorn/misc/software/ardupilot/Tools/autotest:$PATH

# Gazebo system plugins & models
export GZ_SIM_SYSTEM_PLUGIN_PATH=/mnt/aragorn/misc/software/gz_ws/src/ardupilot_gazebo/build:${GZ_SIM_SYSTEM_PLUGIN_PATH}
export GZ_SIM_RESOURCE_PATH=/mnt/aragorn/misc/software/gz_ws/src/ardupilot_gazebo/models:/mnt/aragorn/misc/software/gz_ws/src/ardupilot_gazebo/worlds:${GZ_SIM_RESOURCE_PATH}
Executing the Simulation Loop
With everything built and configured, running an automated flight test requires two terminals.
Terminal 1: Launch 3D World
gz sim -v4 -r /mnt/aragorn/misc/software/gz_ws/src/ardupilot_gazebo/worlds/iris_runway.sdf --render-engine ogre
Terminal 2: Launch Autopilot SITL
cd /mnt/aragorn/misc/software/ardupilot/ArduCopter
sim_vehicle.py -v ArduCopter -f gazebo-iris --model JSON --map --console
Once SITL connects to Gazebo over port 9002, you can command flight routines directly from the MAVProxy prompt:
STABILIZE> GUIDED
GUIDED> ARM THROTTLE
GUIDED> TAKEOFF 10
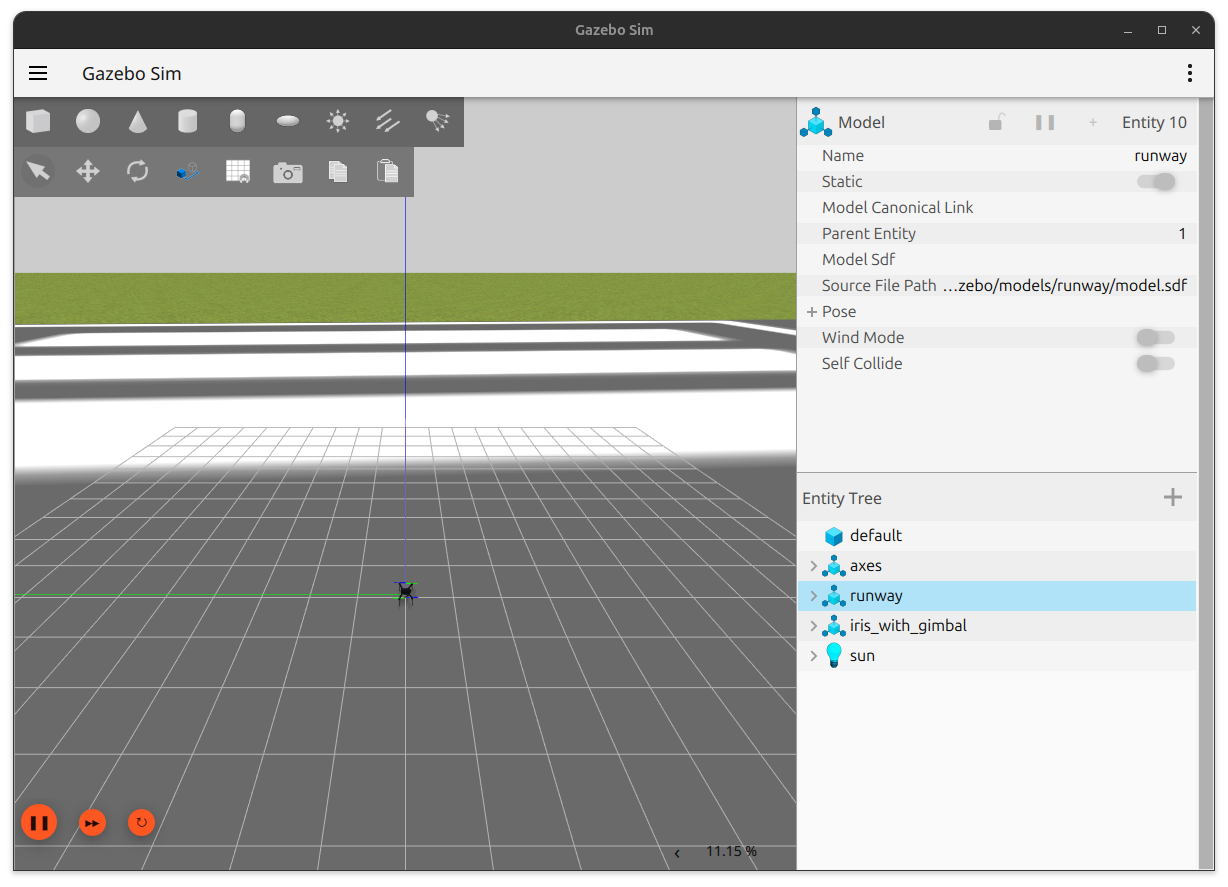
The quadcopter arms, spins up its motors in the Gazebo render window, and climbs smoothly to 10 meters AGL.
Programmatic Control with Python
From here, we can hand off manual CLI control to Python scripts using pymavlink:
import time
from pymavlink import mavutil

# Connect to local SITL instance
master = mavutil.mavlink_connection('udpin:127.0.0.1:14550')
master.wait_heartbeat()

# Set mode to GUIDED
mode_id = master.mode_mapping()['GUIDED']
master.mav.set_mode_send(
    master.target_system,
    mavutil.mavlink.MAV_MODE_FLAG_CUSTOM_MODE_ENABLED,
    mode_id
)

# Arm motors & Take off
master.mav.command_long_send(
    master.target_system, master.target_component,
    mavutil.mavlink.MAV_CMD_COMPONENT_ARM_DISARM,
    0, 1, 0, 0, 0, 0, 0, 0
)
master.motors_armed_wait()

master.mav.command_long_send(
    master.target_system, master.target_component,
    mavutil.mavlink.MAV_CMD_NAV_TAKEOFF,
    0, 0, 0, 0, 0, 0, 0, 10
)
Running this setup locally allows for testing waypoint navigation, custom Lua scripts, and offboard companion computer logic in a safe, cost-free environment before deploying code to physical flight controllers.
Conclusion
Overall, I found this simulation setup a bit tricky, particularly on old hardware. I had a number of crashes during the process, leaving me scratching my head. I will continue to explore this software stack however, as autonomous drone usage is only going to become more common in the future.
More in this series…
- Drone Simulation Testing - Validating the drone simulation stack.
- Drone Autonomy - Exploring autonomous flying with the drone simulation.